





Stop looking at your attic as just a dusty storage space. It is actually your home’s primary defense against the weather. Without it, you are paying to heat or cool the outdoors. The goal is simple: stop heat from moving through walls and ceilings. Lower bills start with that barrier.
But you can’t just throw loose-fill into the rafters and call it a day. If you skip the prep work, air will leak out faster than your money. The real work begins high up in the eaves. You need to install foam channels there first.
These channels create a critical air gap. That gap prevents your insulation from blocking the flow of air from soffit vents into the attic. Blocked vents lead to moisture buildup. Moisture leads to rot. Rot costs thousands. So, before you even unroll a single batt, you have to secure these channels.
It’s a small step. It’s easily ignored by DIYers rushing to save time. But it is the difference between a dry, efficient attic and a moldy, expensive mess. Get the eaves right, and the rest of the insulation job stays effective for years. Miss it, and you’re fighting humidity all winter long.

Why Insulation Blocks Vents
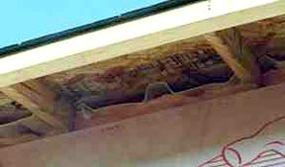
You might think tucking insulation into the eaves is just good practice. It’s not. Without proper channels, that fluffy fiberglass expands right into the soffit vents. It chokes the intake. The air stops moving. Heat builds up. You end up with a hotter roof and higher energy bills.
This house uses standard fiberglass insulation throughout. It’s cheap. It’s common. But it’s also messy if you don’t contain it.
The Rake Vent Solution
To solve this, the builders installed rake vents. These are designed to fit into the triangular space under the roof overhang. They create a clear channel. Air can flow freely from the soffit vents up to the ridge vents. No blockage. No stagnation.
How It Works in Practice
- Cut the opening : Measure the rake edge. Cut a slot in the fascia or soffit panel.
- Install the vent : Slide the rake vent into place. It usually locks into the drip edge or fascia.
- Seal the edges : Use caulk or flashing tape. You need an airtight seal around the vent frame to keep bugs and weather out.
- Insulate around it : Push the fiberglass insulation up to the vent. Do not push it into the vent. The channel stays open.
“Without these channels, insulation tends to expand into the eaves and block the soffit vents.”
Tools and Materials You’ll Need
- Rake vents : Metal or plastic, depending on your roof style.
- Utility knife : For trimming the fascia.
- Caulk gun : For sealing gaps.
- Fiberglass insulation : Batts or blown-in, whichever matches your existing setup.
- Safety gear : Goggles and a mask. Fiberglass irritates. Don’t skip this.
Why This Matters for DIY
If you skip the channels, you’re gambling with your roof’s longevity. Moisture traps. Mold. Rot. It’s not worth the risk. The rake vents are cheap insurance. They cost pennies per linear foot compared to the cost of fixing a rotted rafter.
Measure twice. Cut once. Keep the air moving.

Why your walls need a vapor barrier
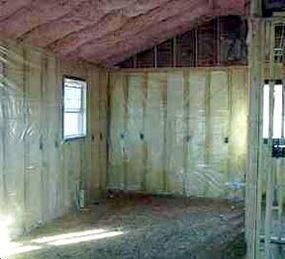
You will see a thin sheet of plastic over the insulation. That is a vapor barrier. It has one job: keep the moisture generated inside your home from escaping into the wall cavity.
Skip it and you invite trouble in the winter. Warm air from your living space pushes through the drywall. It enters the cold wall cavity. The air cools down rapidly. The moisture in that air condenses. Water soaks the insulation. Wet insulation does not insulate. It rots. It encourages mold.
Older homes had a different problem. Their siding and sheathing were loose. Air leaked out before it could condense. The building “breathed.” That natural leakage is gone in modern construction. Sealed walls are efficient but dangerous for moisture. You need the plastic sheet. It stops the process before the damage starts.