




Power tools are the backbone of any serious DIY project. Whether you are cordless, corded, or gas-powered, these machines turn hours of manual labor into minutes of work. But they don’t maintain themselves.
Most homeowners treat their tools like disposable items. They break them, buy new ones, and repeat the cycle. That is a waste of money. With a little routine care, your equipment can last decades, not just seasons. The difference between a tool that dies in two years and one that lasts twenty years is often just a few minutes of cleaning and a tube of grease.
Let’s start with the workhorse of the garage. The electric hand drill. It is probably the most overworked tool in your shed. You use it for drilling holes, driving screws, polishing surfaces, sanding edges, and grinding metal. The abuse it takes is significant. If you want it to survive, you need to treat it right.
Keep Your Drill Bits Sharp
A dull drill bit is dangerous. It requires more pressure, which strains the motor. It also produces excessive heat. You can’t run a hot motor for long without causing internal damage.
Sharpen your bits regularly. If they are chipped or worn down to nubs, throw them away. Cheap bits break expensive chucks. Don’t skimp here.
Prevent Overheating
Drills get hot. This is normal. But if you run it continuously for extended periods, the motor can overheat. You need to let it cool down. Take a break every ten to fifteen minutes of continuous use.
You can also help the tool by keeping its air vents clean. Dust and sawdust clog these vents faster than you think. Use compressed air to blow out the vents and the motor housing. For stubborn grime on the fan blades, use an old toothbrush. It’s surprisingly effective.
Clean the Exterior
After every project, wipe down the drill. Use a clean cloth dampened with a mild household detergent. This removes dust, grease, and debris that can corrode the casing or seep into the mechanism.
For the metal surfaces, apply a light film of oil using a soft cloth. This prevents rust. Rust is the silent killer of power tools. A little oil goes a long way.
Battery Care for Cordless Models
If you use a cordless drill, the battery is your lifeline. Do not let it sit completely drained for months. Charge it when it gets low. Store it in a cool, dry place. Extreme temperatures degrade lithium-ion batteries quickly.
“A clean drill runs cooler and lasts longer.”
This isn’t just about saving money. It’s about safety. A poorly maintained tool is a hazard. It can kick back, overheat, or fail unexpectedly. Take the extra five minutes to clean your drill. Your future self will thank you when you need it for the next big project.
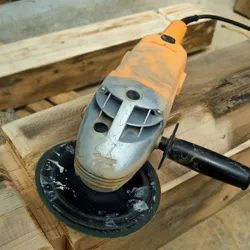
Sander maintenance is about more than just swapping out grit. It is about keeping the motor from choking on its own debris.
Sanders are dust magnets. They pull in more particulate matter than you might expect. That dust doesn’t just sit there. It gets into the fan. It coats the vents. When that internal grime thickens, airflow stops. The motor overheats. The tool dies.
You don’t need a technician to fix this. You need discipline.
Clean the fan regularly. Use a brush. Blow compressed air through the openings. Or, if you’re feeling reckless, fill your lungs and blow on those areas yourself. Just don’t let the filth build up enough to obstruct the fan blades.
Always use the dust bag. And empty it before it fills up. A full bag restricts airflow faster than you think.
After every project, strip the sandpaper. Blow out the vents with compressed air. Scrub stubborn grime with an old toothbrush. Check the alignment of your sandpaper. If it’s off-center, sparks will fly from the platen assembly. The paper might veer sideways or slide off entirely. Clean it. Replace it. Keep it aligned.
### 8: Drill Press
Drill presses are a different beast entirely. They come in hand-held, bench, and floor models. Size varies. Maintenance rules do not.
Rust is the enemy here. Wipe down the table. Wipe down all exposed metal surfaces. Use oil. Or use paste wax—a thin, moisture-resistant sealant. Apply that wax to stationary surfaces too. It creates a barrier against humidity.
If you use the press often, timing matters. Check the front bearings once a month. Check the motor oil cups twice a year. You are looking for nascent problems. Small leaks. Dry spots. Catch them early.
Fixing a small issue now prevents a full-blown mechanical headache later.
Drip No. 20 SAE oil into the bearing slots. Just enough to coat. Not so much that it drips onto your workpiece.
### 7: Saber Saw
Saber saws vibrate. A lot. That vibration loosens things. It dulls blades. It wears down the shoe.
Keep the blade sharp. A dull blade forces the motor to work harder. It creates heat. It burns through your wood. Replace blades when they chip or bend.
Check the shoe plate. It should sit flat against the material. If it’s warped or clogged with pitch, your cuts will be crooked. Clean the bottom with a solvent to remove resin buildup.
Inspect the cord for fraying. The constant motion of sawing can wear through insulation near the trigger or where the cord exits the housing.
Tighten any loose knobs or levers. The vibration of a saber saw will loosen hardware over time. A loose clamp means a loose blade. A loose blade means a dangerous kickback.
Lubricate the oscillating mechanism if your model has accessible points. Follow the manufacturer’s specs. Use the right grease. Don’t guess.
Keep the air vents clear. Saber saws generate heat. Dust clogs those vents. Blow them out after every use.
Store the tool with the blade retracted
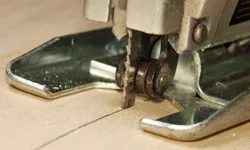
The Saber Saw Myth and Reality
You think the saber saw is just for cutting curves in wood? That’s only half the story. It cuts metal, drywall, rubber, leather, and even asphalt. But here is the thing that kills these tools faster than anything else: you are probably using it wrong.
Most owners don’t realize that their bad habits are burning out the motor. Don’t engage the blade until the motor hits full speed. It sounds simple, but skipping this step puts undue stress on the mechanism. Match the speed to the material. Soft surfaces? Crank up the pace. Hard mediums? Slow it down.
Look at your cuts. Brown burn marks on the wood? That is a distress signal. It means your blade is dull. If you have the skill, sharpen it. If not, pay a pro. A sharp blade isn’t just about clean lines; it’s about saving your motor. Dull blades cause overheating, power loss, and eventual failure. They also rattle, bend, or jam. When sharpening no longer works, replace the blade. No excuses.
After every use, unplug the saw. Grab an old toothbrush and scrub the roller, collar, and base of the blade shaft assembly. Use compressed air to blow out the vents. Once a year, service the blade shaft assembly thoroughly. Ignore this, and you’re throwing money away.
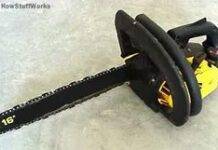
Chain Saw Care for Serious Projects
When you are felling trees or chopping logs, the chain saw is your best friend. It’s powerful, but it’s also finicky. Debris and dirt are the enemies. They clog vents, cause erratic running, and lead to overheating.
Start with the fuel cap vent. Clear it with a toothpick. Blocked vents starve the engine. Next, tackle the air filter. Tap a paper filter against a hard surface to knock loose dirt. If it’s mesh or another material, you’ll need a screwdriver to take it apart. Wash it with water and household detergent. Let every piece dry completely before reassembling. Wet filters ruin engines.
A dirty muffler is just as bad. Disconnect the spark plug first. Drain the fuel tank. Unscrew the muffler cover. Replace any damaged parts and tighten interior screws. Use a wire brush to remove debris from the muffler and engine cooling fins. Clean fins mean better heat dissipation.
Check the carburetor. If it’s not calibrated correctly, your chain saw won’t start. Period. Finally, inspect the chain. Correct tension is non-negotiable. Sharpen the teeth as needed to ensure an even cut. A jagged cut strains the engine.
Hedge Trimmer Maintenance
Hedge trimmers get abused. They cut through thick branches, get coated in sap, and are often left outside in the rain. This neglect shortens their lifespan significantly. Most homeowners don’t realize that regular cleaning and blade lubrication are the only things standing between a trimmer that works and one that seizes up.
Start by unplugging the tool, whether it’s electric or battery-powered. For gas models, disconnect the spark plug wire to prevent accidental starts. Remove any clippings from between the blades. Use a stiff brush to clear out debris. Sap is the enemy here. It hardens and prevents the blades from moving freely. Use a solvent or a specialized cleaner to dissolve sticky residue.
Inspect the blades for nicks or dull spots. Dull blades crush plants instead of cutting them, which stresses the motor. Sharpen them with a flat file or take them to a sharpener. Lubricate the blades after cleaning. This reduces friction and prevents rust. For gas-powered trimmers, check the air filter and clean or replace it. A clogged filter reduces power and increases fuel consumption.
Check the drive mechanism. Grease the gears if your model requires it. Tighten any loose bolts or screws. Vibration can loosen components over time. Store the trim
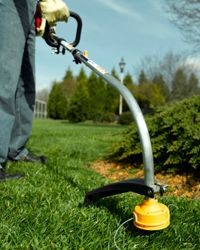
4: String Trimmer
If you keep your garden’s borders sharp, you know the string trimmer is your best friend. These machines come in two flavors: gasoline or electric. Both rely on a spinning head that whips a nylon filament string. The speed is dangerous. You need gloves, safety goggles, and sturdy boots just to stand near it. Don’t skip the safety gear.
Before you fire it up, clear the debris. Use a stick or a stiff brush to knock dirt and clippings off the deflector. It sounds small, but buildup causes overheating.
When storing or repairing, handle fuel with care. Drain any remaining gas into a metal container. Stand at least 10 feet away—about 3 meters—from your work area while doing this. Sparks and fumes don’t mix.
3: Lawnmower
The lawnmower eats more fuel and takes more abuse than any other tool in the shed. You can’t just wipe it down and hope for the best. The deck is where the battle happens. Grass clings to the underside, turning into a cement-like paste if left alone.
Cleaning the Deck
Flip the mower. Always disconnect the spark plug wire first. You don’t want the engine turning while you’re scraping rust and dried grass. Use a putty knife or a specialized deck scraper to remove the buildup.
Wash the underside with water if you have a gas engine and can keep the air filter dry. Electric mowers? Be careful with water. Just scrape. A clean deck cuts cleaner. It lifts the grass instead of tearing it. Torn grass turns brown at the tips. It invites disease.
Blade Care
Dull blades are a waste of time. They chop the grass into frayed shreds. Find a blade balancing kit or a simple nail and a hammer. Hang the blade on the nail. If it dips to one side, it’s unbalanced. Grind down the heavier side until it sits level.
Sharpen the edge with a mill file or a bench grinder. Keep the original angle. Don’t change the geometry. Sharpening every 20 to 25 hours of use keeps your cut clean.
Air Filter Check
A clogged air filter chokes the engine. It sputters. It loses power. Pull out the foam or paper filter. Tap out the loose dust. Wash foam filters in soapy water. Let them dry completely before oiling them back up. Paper filters? Replace them. They don’t clean well.
Oil Changes
Check the oil level before every run. Dip the stick. Wipe it. Check again. Low oil kills engines faster than anything else. If the oil looks like chocolate milk, you have a coolant leak. Stop immediately. Don’t drive a leaking engine. It will seize.
Change the oil after the first 5 hours of operation on a new mower. Then every 25 hours or once a season, whichever comes first. Use the viscosity specified in the manual. SAE 30 is common for warm weather. 10W-30 works in variable climates.
Spark Plug
Pull the plug. Look at the tip. It should be light tan or gray. Black means too much fuel. White means too much air. Replace it if it
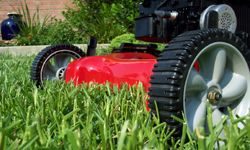
A lawnmower isn’t just a tool; it’s a long-term investment. Treat it right and it lasts forever. Treat it poorly and you’re buying a new one every few years. The difference comes down to routine. Check the oil. If you have a four-stroke engine, drain and refill every 25 hours. Don’t skip this. Old oil breaks down. It gums up the works.
Fuel is the next enemy. Stale gasoline contaminates the engine. It sits there, oxidizes, and clogs everything. Keep the tank fresh. Always.
Pay attention to the air and fuel filters. A clogged filter kills power. It makes the engine run erratic. It might not start at all. Tap paper filters against a hard surface to get the dust out. Wash others with mild soap and water. Let them dry completely before putting them back. Never install a wet filter.
And for the love of clean air, scrape off the grass clumps after every mow. It’s annoying to stop and clean, but it’s faster than repairing a stuck blade or a choked carburetor. Follow the manufacturer’s manual. Calibrate the carburetor if the instructions say so. Listen to the machine. It tells you what it needs.
Maintaining Motorized Garden Tillers
Tillers do the heavy lifting. They break new ground. They mix in compost or soil amendments. But they operate in the dirt. They get caked in mud and debris. This makes them vulnerable.
Consult your owner’s manual for specific care instructions. General rule: wipe it down after every use. Don’t let the grime build up.
Clean the fuel tank and air filter regularly. A dirty air filter causes stalling. It causes erratic running. If your tiller dies in the middle of a row, you’re wasting time and energy.
Paper filters can be tapped clean. Foam or fabric filters might need washing. Use mild household detergent and water. Rinse well. Dry fully. Then reinstall.
Check the fuel tank cap vents. Clear any blockages. If the vent is clogged, air can’t flow into the tank. The engine runs infrequently. It sputters. It dies. You’re left standing in the garden with a dead machine.
Adjust the carburetor to ideal conditions as your manual directs. Small adjustments make a big difference in performance.
Preparing Your Snow Blower for Winter
Winter is coming. Your snow blower has been waiting. It’s been sitting in the shed, quiet and still. Now it needs to be ready for action.
Check the oil level. Top it off if needed. Use the type specified in the manual. Incorrect oil can damage the engine in cold weather.
Inspect the spark plug. Remove it. Clean it. Replace it if it looks worn. A weak spark means hard starts. You don’t want to struggle with a stubborn snow blower in a blizzard.
Check the drive belts. Look for cracks or fraying. Tighten them if necessary. Loose belts slip. They don’t move the auger. You push the snow blower instead of letting it do the work.
Lubricate the moving parts. The auger shaft. The chute rotation. Use a grease gun or a spray lubricant. Follow the manufacturer’s recommendations. Dry lubricants work
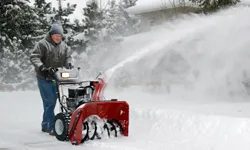
Wintering Down the Snow Blower
If you are buried under drifts every January, this machine is your lifeline. A snow blower doesn’t just push snow. It ejects it. That matters. You stand in place while the machine throws the slush away from your feet. It is a massive time saver. But like any power tool, it only lasts if you treat it right. Ignore maintenance and you will be buying a new one. Keep up on it and it should outlive you.
Engine Care Basics
Start with the basics. The carburetor needs adjusting. Do not guess. Pull the owner’s manual and follow the steps. The fuel has to be clean. Old gas breaks things. If you have a four-cycle engine, oil is everything. Check the level often. Drain and refill the crankcase after every 25 hours of use. That is a hard limit. Do not push it.
Keep the machine clean. Preventative care beats repair every time.
Cleaning the Guts
Snow is heavy. It gets everywhere. Fuel filters clog. Vents on the tank cap get blocked. Engine cooling fins get packed with ice and slush. Clean them. A clogged filter starves the engine. Blocked vents cause pressure issues. Dirty fins let the motor overheat. You need all three clear for the next season.
The Shutdown Routine
When you are done for the day, do not just walk away. Turn it off. Disconnect the spark plug. This is non-negotiable for safety. Brush away all snow from the discharge chute. The auger assembly collects it. The housing traps it. Leave it and you risk a jam that cracks the case next time you pull the cord.
Store it dry. That sounds easy. It is not. Restart the blower and let it run for a few minutes. The heat melts the remaining moisture. It evaporates. Turn it off again. Disconnect the spark plug one more time to be sure. Close the fuel shutoff valve. Remove the key.
Storing for the Long Haul
Find a clean, dry spot. A garage is ideal. A shed works. A damp basement will rot the cables and rust the bolts. Make sure it stays dry. If you do this, you will be ready when the first flake falls next year. You will not be fighting a cold start. You will just pull the cord and go.
Looking Ahead
Winter ends eventually. The snow melts. The ground thaws. What do you do with the space you just freed up? The lawn looks tired. The edges are uneven. The path to the door is still cracked concrete. You have the energy. You have the tools. The next step is fixing what the snow exposed.